Microsoft OneDrive is an online storage platform for all of your files to be synced and accessible across all of your devices and online.
University of Central Florida has provided anyone with an @ucf.edu email address access to Microsoft OneDrive. UCF's OneDrive provides you with up to 5TB of storage for your data. This storage is intended for your individual usage, and can be shared with other individuals.
Use OneDrive to collaborate, access your data from anywhere, keep your data backed up, and more.
Sign In
Sign in and Set Up
If you have Office 365 or a Windows 10 device, OneDrive will already be on available your computer. Search OneDrive on your computer's search menu (located in the bottom left-corner).
1. Once you have OneDrive open, you will need to click Sign in. In the email field put in @ucf.edu to be redirected to the UCF Federated Identity login page and sign in as you normally would with your NID and Password.
2. After a successful NID login, you will be asked to register your NID with MS Authenticator. Please click the 'Next' button as seen below:
3. Next, you will be asked to download the MS Authenticator app if your device has not been installed.
a. If you do not have the MS Authenticator App installed on a personal device (such as a smartphone), please select the 'Download now' link in arrow 1.
b. Once downloaded, or if you already have MS Authenticator installed on your device, please select 'Next' shown in arrow 2.
| UCF strongly encourages using the MS Authenticator app as your primary MFA method. However, suppose you do not choose to use the MS Authenticator app. You may also use a FIDO2 Security Key or your phone number by clicking on the 'I want to set up a different method' link in the image's bottom left corner. |
4. Please open the MS Authenticator app on your device. On the main Authenticator screen, you will see a '+' sign allowing you to add a new account to the app.
a. Click the '+' sign.
b. You will be asked what type of account you are registering for. Please select 'Work or school account.'
5. Select 'Next' on your web browser as seen below:
6. Your web browser will now show a QR code, as seen in the example below. You may scan this QR code with your device by selecting the 'Scan a QR Code' option. Please note that you will need to scan the QR code with the MS Authenticator app. Using a generic QR reader will result in a registration error.
7. After scanning the QR code with the MS Authenticator app, your web browser will ask you to approve the request using the MS Authenticator app.
8. Once the number has been entered into MS Authenticator and is recognized by the app, your web browser will load a screen noting that your MFA authentication was approved:
9. Congratulations! Your MS Authenticator registration is successful and complete!
You may now click the 'Done' button to close the registration page and be taken to the application you initially logged into.
Changing the Microsoft Authenticator Default Sign-In Option
1. Open a web browser and navigate to https://aka.ms/mysecurityinfo
2. Login with your full NID (include the @ucf.edu)
3. Authenticate with your NID and password once prompted.
4. Respond to the MFA prompt displayed in your web browser using the MS Authenticator app on your device.
5. Once authenticated, the Security info page is displayed:
6. Arrow 1 will allow you to change your default notification method. Options include:
a. MS Authenticator App (recommended).
b. FIDO2 Security Key (can be used instead of a smartphone).
c. Phone number.
7. Arrow 2 will allow you to change the phone number associated with your account. This is useful for having a secondary MFA option if your device is not with you.
8. Arrow 3 grants the ability to remove authentication options.
9. Arrow 4 will sign your NID from any active sessions that MS Authenticator protects. This is a powerful option to access if your MFA device is missing and unsecured.
| Passwordless Authentication: You may sign in with your smartphone without a password. For further assistance configuring Microsoft Authenticator and enabling smartphone sign-in, see Sign in to your accounts using the Microsoft Authenticator app. |
Note: On MacOS, OneDrive may need to be installed manually from Microsoft's website.
My OneDrive Folder
After signing in, on the Windows File Explorer or Mac Finder you will now notice an expandable menu titled OneDrive. Everything stored within this folder will automatically sync and backup to OneDrive.
Selective File Syncing & Offline Access
What is File Syncing?
OneDrive is a great tool to make sure your data is safe, always updated, and accessible anywhere you have an Internet connection. You can access them on your UCF Device, personal computer, tablet, and even your cell phone. File syncing allows the files to exist locally on a device and online at the same time with the most up-to-date version.
OneDrive Status
Within the OneDrive folder, you will see different statuses for each file. Each status icon indicates what state that file or folder is currently in.
A file with either green symbol is representative of the file stored on that device and can be opened with or without an Internet connection.
Work or Study from Anywhere.
Need to finish work on a plane without Internet? With OneDrive, you can still access specific files offline. While still connected to the Internet, right-click any file or folder that is on OneDrive and select “Always keep on this device” so it will always be available. The file's status will now show as a solid green check mark as shown above. Any files edited while offline will automatically update the online copy after reconnecting to the Internet.
Collaboration & Sharing
Collaboration
You can view and edit files, as well as collaborate with your coworkers, researchers, and external users in real-time. OneDrive allows sharing files and folders easily from your desktop or a web browser. Everyone who has access to these files will always have the most up to date version.
Sharing with Individuals
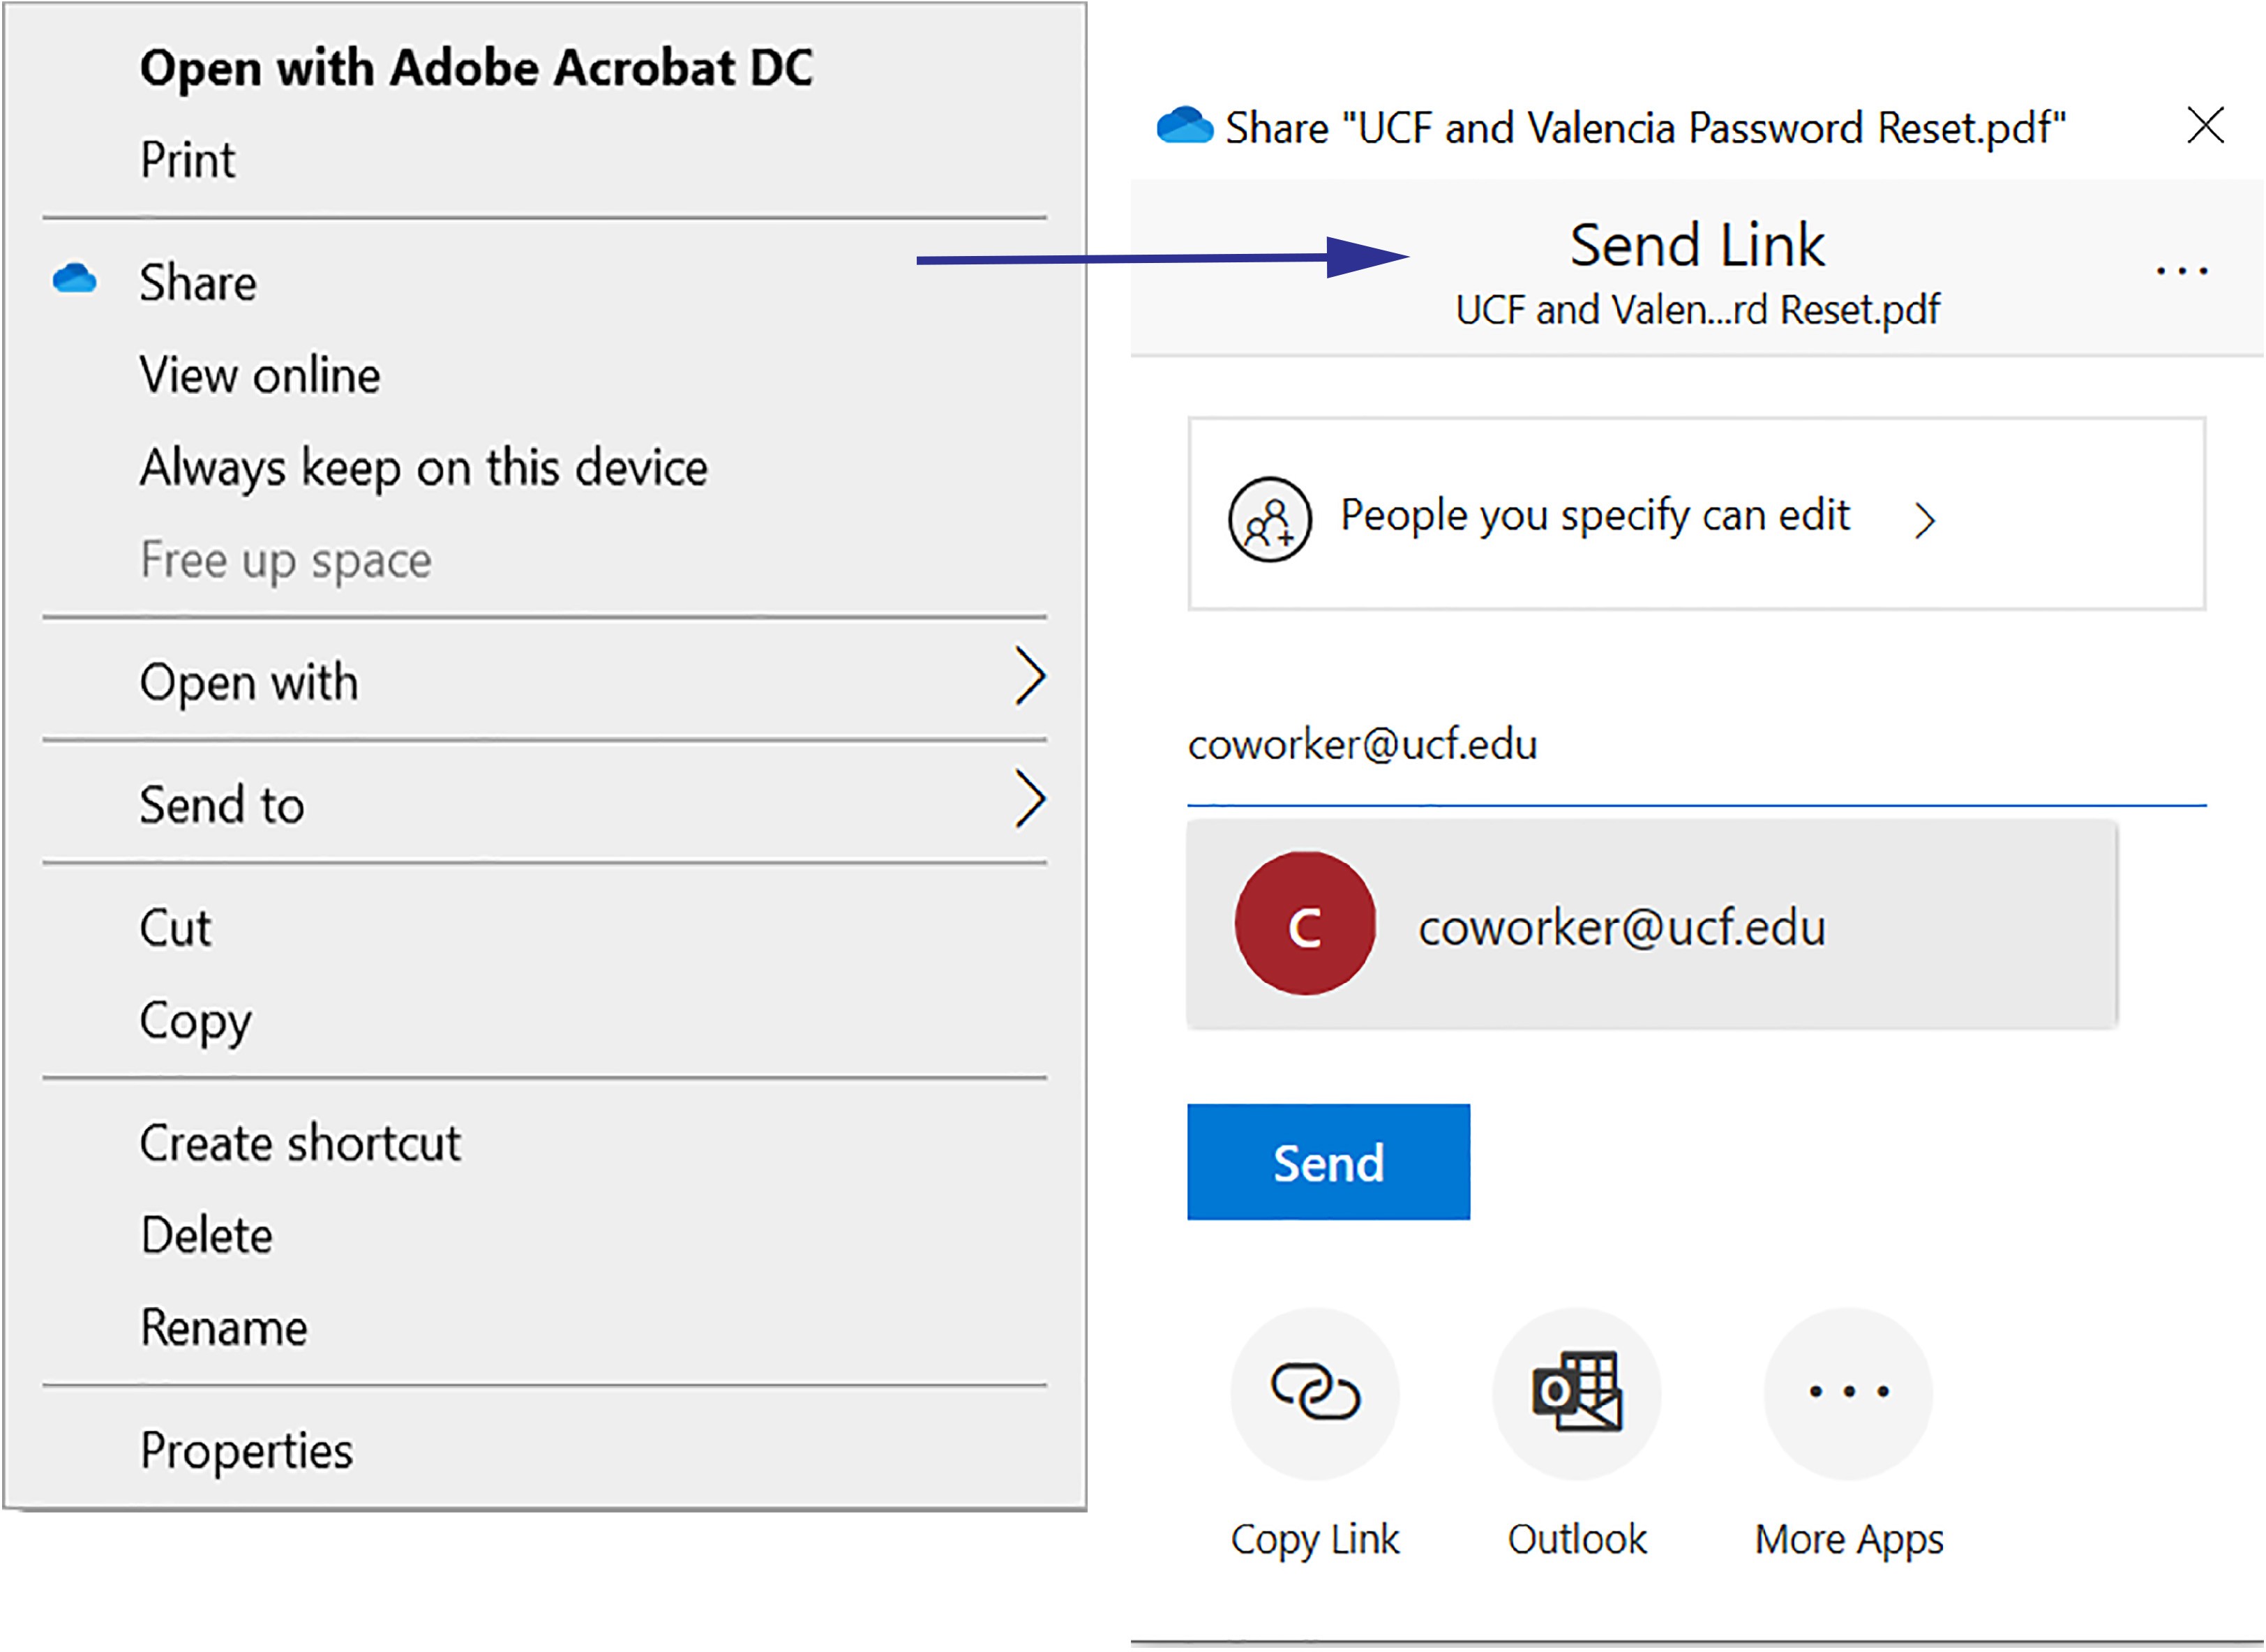
Sharing with OneDrive is easy. Right click on a OneDrive file or folder and click “Share”. You can share with anyone by entering their email address within the next text box.
Please note that any external users including anyone using a @knights.ucf.edu email address or individuals outside of the university will only be able to use a link to view/edit the file. They will need to sign in to a Microsoft account and be connected to the Internet when accessing shared files.
Sharing with any UCF Employee, Staff, Faculty or Student
To enable anyone with an @ucf.edu email to view your file, right-click and share a OneDrive file the same way you would with an individual. Then, click "People you specify can edit". Select "People in University of Central Florida with the link." Generally, you will want to disallow editing by unchecking the box shown to the right.
Using OneDrive Online
Sign In
1. You can sign in to OneDrive via a web browser by navigating to OneDrive.com. Select "Sign In" and enter your @ucf.edu email address. You will be sent to the UCF Federated Identity login page. Sign in here with your standard NID and NID password and authenticate with Microsoft Authenticator application. You now have access to all files stored on OneDrive.
2. After a successful NID login, you will be asked to register your NID with MS Authenticator. Please click the 'Next' button as seen below:
3. Next, you will be asked to download the MS Authenticator app if your device has not been installed.
a. If you do not have the MS Authenticator App installed on a personal device (such as a smartphone), please select the 'Download now' link in arrow 1.
b. Once downloaded, or if you already have MS Authenticator installed on your device, please select 'Next' shown in arrow 2.
| UCF strongly encourages using the MS Authenticator app as your primary MFA method. However, suppose you do not choose to use the MS Authenticator app. You may also use a FIDO2 Security Key or your phone number by clicking on the 'I want to set up a different method' link in the image's bottom left corner. |
4. Please open the MS Authenticator app on your device. On the main Authenticator screen, you will see a '+' sign allowing you to add a new account to the app.
a. Click the '+' sign.
b. You will be asked what type of account you are registering for. Please select 'Work or school account.'
5. Select 'Next' on your web browser as seen below:
6. Your web browser will now show a QR code, as seen in the example below. You may scan this QR code with your device by selecting the 'Scan a QR Code' option. Please note that you will need to scan the QR code with the MS Authenticator app. Using a generic QR reader will result in a registration error.
7. After scanning the QR code with the MS Authenticator app, your web browser will ask you to approve the request using the MS Authenticator app.
8. Once the number has been entered into MS Authenticator and is recognized by the app, your web browser will load a screen noting that your MFA authentication was approved:
9. Congratulations! Your MS Authenticator registration is successful and complete!
You may now click the 'Done' button to close the registration page and be taken to the application you initially logged into.
Changing the Microsoft Authenticator Default Sign-In Option
1. Open a web browser and navigate to https://aka.ms/mysecurityinfo
2. Login with your full NID (include the @ucf.edu)
3. Authenticate with your NID and password once prompted.
4. Respond to the MFA prompt displayed in your web browser using the MS Authenticator app on your device.
5. Once authenticated, the Security info page is displayed:
6. Arrow 1 will allow you to change your default notification method. Options include:
a. MS Authenticator App (recommended).
b. FIDO2 Security Key (can be used instead of a smartphone).
c. Phone number.
7. Arrow 2 will allow you to change the phone number associated with your account. This is useful for having a secondary MFA option if your device is not with you.
8. Arrow 3 grants the ability to remove authentication options.
9. Arrow 4 will sign your NID from any active sessions that MS Authenticator protects. This is a powerful option to access if your MFA device is missing and unsecured.
| Passwordless Authentication: You may sign in with your smartphone without a password. For further assistance configuring Microsoft Authenticator and enabling smartphone sign-in, see Sign in to your accounts using the Microsoft Authenticator app. |
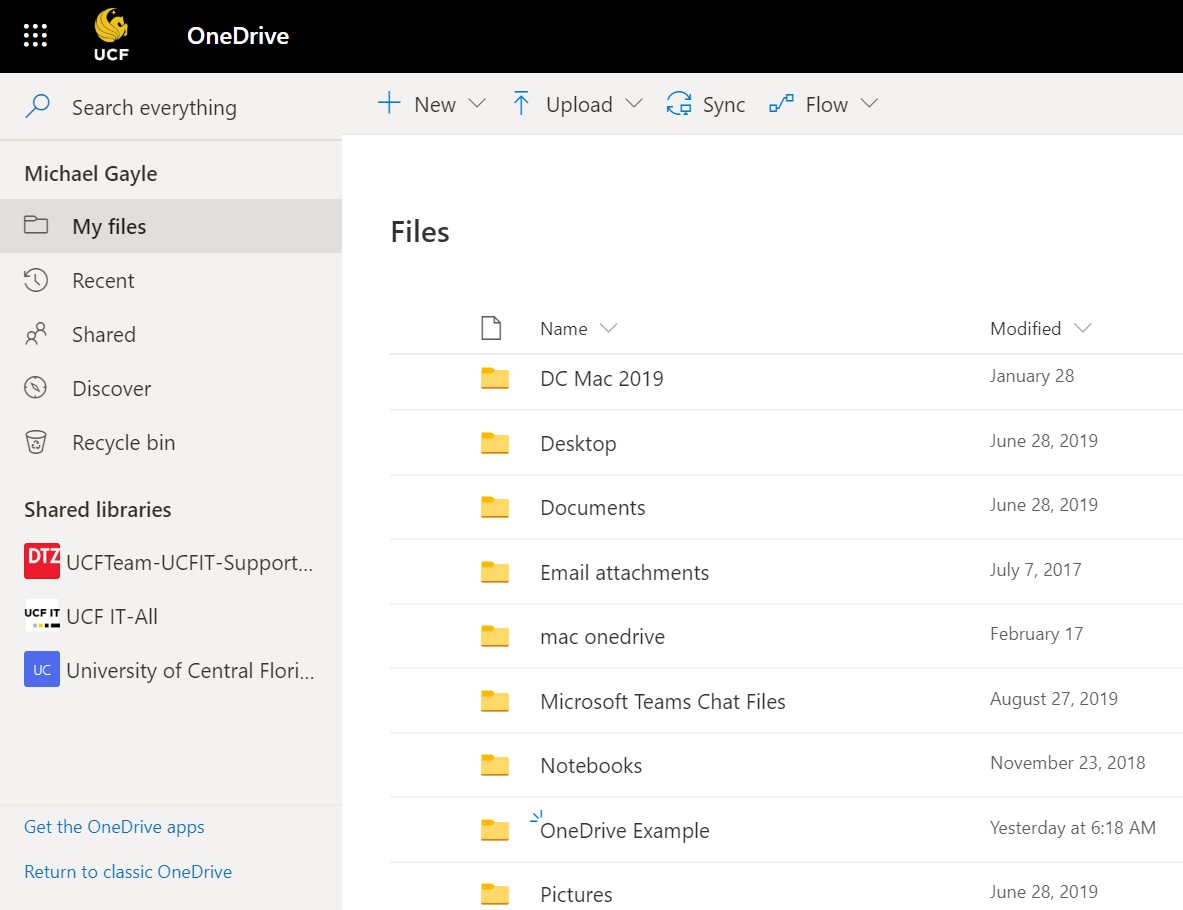
OneDrive Online
All the files and folders saved in the OneDrive folder on your computer will also appear here. On the left-hand panel you can look at recently opened files, files that someone is currently sharing with you, your OneDrive recycle bin, as well as any Microsoft Teams shared libraries you have access to.
Viewing & Syncing Shared Files and Folders
Another Way to Get Online
When using your UCF provided device, OneDrive Online can also be accessed by clicking the OneDrive cloud from the toolbar, and clicking "View Online". OneDrive will then open on your default Web Browser.
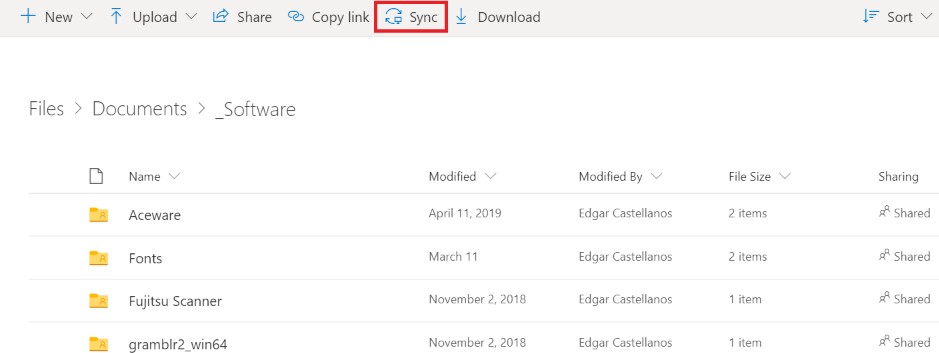
Syncing a Shared Folder to OneDrive on your Computer
From inside the shared folder menu select "Sync" from the top menu. This will allow access to the shared folder at all times from your device inside your OneDrive folder.
Note: You can only sync a shared folder not an individual shared file.
Viewing a Shared File or Folder
From OneDrive Online you can view your shared folders and sync them with your device. Click the "Shared" on the navigation panel on the right-side of the screen. Next select the shared folder you would like to view.
Note: If you're having trouble finding the folder that you're looking for, select "Date shared" to view most recently shared files.
Restoring Files & Version History
Version History
OneDrive automatically saves your documents while you work on them, making past versions easy to recover if necessary. To see older versions of a file, right-click on "OneDrive Online" version of document, and select "Version History".
Restoring Versions
Clicking on "Version History" will bring up all automatically saved versions. In order to restore a file to an older version, right-click the version you want to restore and select "Restore."
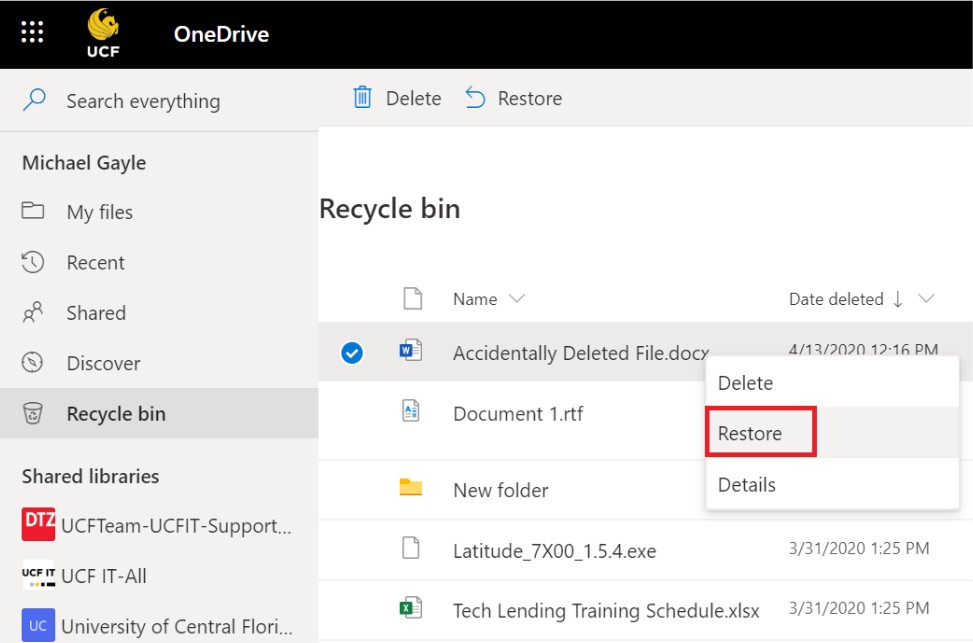
Recovering Files
Deleted files stay in the OneDrive Recycle Bin for up to 90 days before they are automatically deleted. If a file is mistakenly deleted, you can retrieve it by going to the OneDrive Online, clicking on “Recycle Bin”, selecting the file, and click “Restore.”
OneDrive Mobile
Download OneDrive Mobile
1. With the OneDrive mobile application start work on your computer, and continue work on your mobile device. Download "Microsoft OneDrive" from your phone's app store. Once the download is complete, open the app and tap "Sign In". Enter your @ucf.edu email address. You will be directed to sign in to the UCF Federated Identity with your NID and NID password and authenticate with the Microsoft Authenticator application.
2. After a successful NID login, you will be asked to register your NID with MS Authenticator. Please click the 'Next' button as seen below:
3. Next, you will be asked to download the MS Authenticator app if your device has not been installed.
a. If you do not have the MS Authenticator App installed on a personal device (such as a smartphone), please select the 'Download now' link in arrow 1.
b. Once downloaded, or if you already have MS Authenticator installed on your device, please select 'Next' shown in arrow 2.
| UCF strongly encourages using the MS Authenticator app as your primary MFA method. However, suppose you do not choose to use the MS Authenticator app. You may also use a FIDO2 Security Key or your phone number by clicking on the 'I want to set up a different method' link in the image's bottom left corner. |
4. Please open the MS Authenticator app on your device. On the main Authenticator screen, you will see a '+' sign allowing you to add a new account to the app.
a. Click the '+' sign.
b. You will be asked what type of account you are registering for. Please select 'Work or school account.'
5. Select 'Next' on your web browser as seen below:
6. Your web browser will now show a QR code, as seen in the example below. You may scan this QR code with your device by selecting the 'Scan a QR Code' option. Please note that you will need to scan the QR code with the MS Authenticator app. Using a generic QR reader will result in a registration error.
7. After scanning the QR code with the MS Authenticator app, your web browser will ask you to approve the request using the MS Authenticator app.
8. Once the number has been entered into MS Authenticator and is recognized by the app, your web browser will load a screen noting that your MFA authentication was approved:
9. Congratulations! Your MS Authenticator registration is successful and complete!
You may now click the 'Done' button to close the registration page and be taken to the application you initially logged into.
Changing the Microsoft Authenticator Default Sign-In Option
1. Open a web browser and navigate to https://aka.ms/mysecurityinfo
2. Login with your full NID (include the @ucf.edu)
3. Authenticate with your NID and password once prompted.
4. Respond to the MFA prompt displayed in your web browser using the MS Authenticator app on your device.
5. Once authenticated, the Security info page is displayed:
6. Arrow 1 will allow you to change your default notification method. Options include:
a. MS Authenticator App (recommended).
b. FIDO2 Security Key (can be used instead of a smartphone).
c. Phone number.
7. Arrow 2 will allow you to change the phone number associated with your account. This is useful for having a secondary MFA option if your device is not with you.
8. Arrow 3 grants the ability to remove authentication options.
9. Arrow 4 will sign your NID from any active sessions that MS Authenticator protects. This is a powerful option to access if your MFA device is missing and unsecured.
| Passwordless Authentication: You may sign in with your smartphone without a password. For further assistance configuring Microsoft Authenticator and enabling smartphone sign-in, see Sign in to your accounts using the Microsoft Authenticator app. |
Tap this icon to create a new file, upload from your mobile device, take a photo, or scan a document.
Tap the three dots to share the file, move the file's
location, delete, rename, or make it available offline.
Tap the "Shared" tab to view files and folder that are being shared with you.
Tap the "Libraries" tab to see what shared file libraries, such as Microsoft Teams you have access to. Note: On iOS this is labeled as "Sites".
Example shown using an Android Phone
What's Next?
Check out more with UCF IT We've only scratched the surface of OneDrive's capabilities. If you have more questions about OneDrive navigate your web browser to "it.ucf.edu" and enter "OneDrive" to check out all the knowledge base articles UCF IT has published.
Unable to find the help you need in the knowledge base? Contact UCF IT support at itsupport@ucf.edu or call at (407)-823-5117.