How to move your OneDrive Files from Knights to an Alternate Account
These instructions are provided to assist Knights users wanting to move their data. UCF IT does not provide technical support for any unsupported software or services.
Option 1: Download your Knights OneDrive files and upload to your @ucf.edu account
Sign in to OneDrive
Go to onedrive.com, and select Sign in at the top of the page.
Enter in your Knights account (example: youremailname@knights.ucf.edu) username and password, select Next.
Type your password and select Sign In.
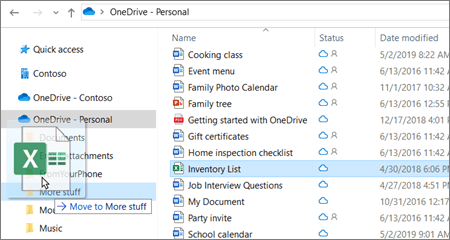
On your OneDrive select the files or folders you want to download.
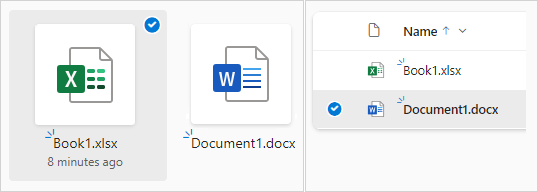
To download individual or multiple files, select each item by clicking the circle check box that appears. (The left image below shows items in List view, the right image shows items in Tiles or Photos view.) (You can also select several files at once by selecting one file, scrolling down the list, then hold down the Shift key while left-clicking the last item you want to select.)
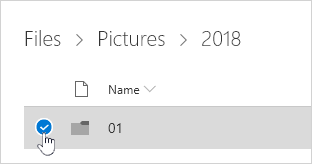
To select all files in a folder, click the circle to the left of the header row, or press CTRL + A on your keyboard.
To select a folder, rather than just its contents, you may need to go up or back a level to select the whole folder.
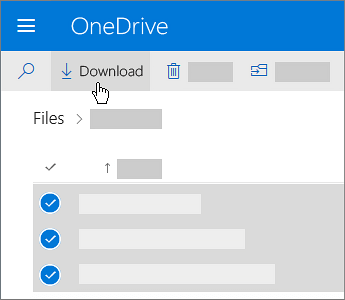
In the top navigation, select Download. (You can also right-click the file, photo, or folder, and select Download.)
Notes:
The Download button will only appear when files or folders are selected.
The Download button may sometimes disappear if you refresh the web page while looking at a folder. To work around this, you can go up one level in the folder directory and come back, or close that tab in your browser and navigate to the folder again.
If your browser prompts you, choose Save or Save As and browse to the location where you want to save the download. (Some browsers just start saving right away to a Downloads folder on your computer.)
If you need to free up space on your OneDrive, download your file or folder to a location outside of your OneDrive folders (see below). You can then delete the OneDrive copy of the file or folder to reduce your storage amount.
If you select multiple files or folders and then select Download from Microsoft OneDrive your browser will start downloading a .zip file containing all the files and folders you selected. If you're in a folder and you select Download without selecting any files or folders, your browser will begin downloading all contents of the folder.
Notes:
Downloads are subject to the following limits: 250GB file size limit; total number of files limit: 10,000; folder size limit: 10000 files.
If you download multiple .zip files, the size limit is 10GB per .zip file and 20GB overall.
Option 2: Transfer files from Knights account to your personal OneDrive
Go to Mover Sign In page. If you already have a personal Microsoft account that you use with services like OneDrive, Microsoft 365, Outlook, or Xbox, use the same account to sign in. If you’ve forgotten your username or password, or need more information about your Microsoft account, see this article.
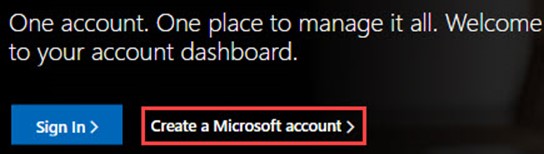
Please note: Files larger than 15 GB aren't migrated using the tool. If you don’t have a Microsoft account, go to this page, and select Create a Microsoft account. You'll use this new account, which includes 5GB of free OneDrive storage, to sign into Mover and transfer your OneDrive files.
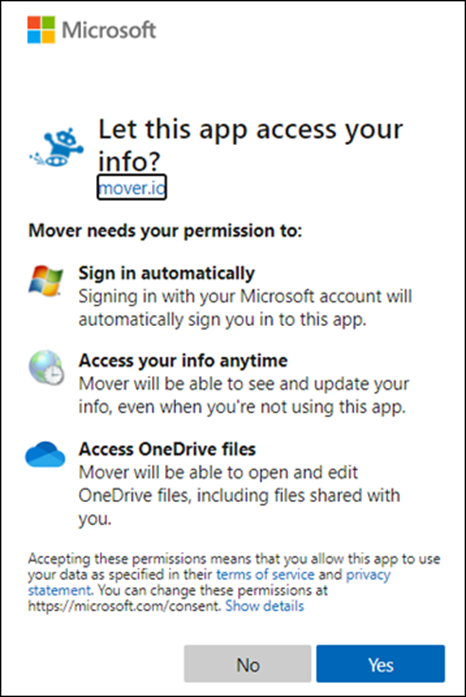
The first time you log in to Mover with your Microsoft account, you'll be asked to give permission to access your files. Select Yes to continue.
On the next page, select Authorize New Connector under Step 1: Select Source.
Then select Authorize next to OneDrive for work or school (Single User). This allows Mover to access your OneDrive files on your Knights account.
Log in with your Microsoft 365 with your Knights account (example: youremailname@knights.ucf.edu) username and password to authorize it as a source location.
Review and select the files and folders that you want to move. Note that all the files and folders in the directory you select, will be moved.
To choose the location that your files will move to, click Authorize New Connector under Step 2: Select destination.
On the next page, select Authorize next to the Microsoft account that you want to move your files to.
Enter the username and password for your personal Microsoft account.
Select an existing folder to move your files to, or select Create Folder if you want a new folder for your files. Under Step 3: Start transferring, select Start copy. Mover transfers a copy of your school files over to your Microsoft account OneDrive.Note: Your original files will remain in your Knights account school and will not be removed.
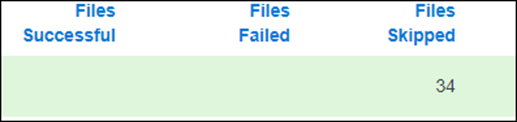
If you want to see more information about the transfer, review the data under Transfer. For example, if you have any Files Skipped, select the number of files in the column and review the files.
Troubleshoot issues
If you run into any issues, get the logs and go to this page to submit a support request.
For example, if files fail to transfer, select the number under Files Failed and then select User Actions > Download Logs, so you can include the logs in your support request. Note that logs are available in Mover for 90 days.
Upload: Using the OneDrive website
On the OneDrive website, sign in with your UCF NID@ucf.edu account and your NID password, and then browse to the location where you want to add the files.
If you use Windows 10, OneDrive may have already asked you to sign in to sync your files.
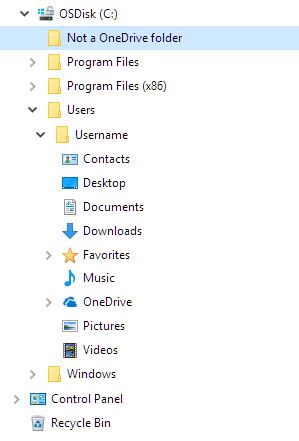
In File Explorer, select: OneDrive – University of Central Florida
Locate the file you want to send to OneDrive, which you'll see in the left side panel of File Explorer. Click the file to select it, then drag and place the icon over OneDrive or a folder in OneDrive until it's highlighted, then drop the file.
You can select an entire folder to drag and drop into OneDrive for a quick, comprehensive transfer from your PC.
You're all set. Just note that dragging and dropping the file to OneDrive will move the file from your PC onto OneDrive and not make a copy.
Upload: Using File Explorer or Mac Finder to copy or move files to OneDrive
You can copy or move files between folders within OneDrive, or from other folders on your computer. (When you move files from other folders on your computer into a OneDrive folder, you're removing them from your computer and adding them to OneDrive.)
For both File Explorer and Mac Finder, if you want to copy the item rather than move it, right-click the file or folder and select Copy, then open the OneDrive folder (or sub-folder) and right-click > Paste a copy of the item to OneDrive.
To move a file using Windows File Explorer, drag files from the file list in the right pane to OneDrive in the left pane.
To move a file using Mac Finder, drag files from the file list in the right pane to OneDrive in the left pane (if you have OneDrive listed there under Favorites). After a moment, Finder will switch to show your existing OneDrive files and folders in the right pane, and you can drag the file into the sub-folder of your choice.
Upload: From Microsoft Office
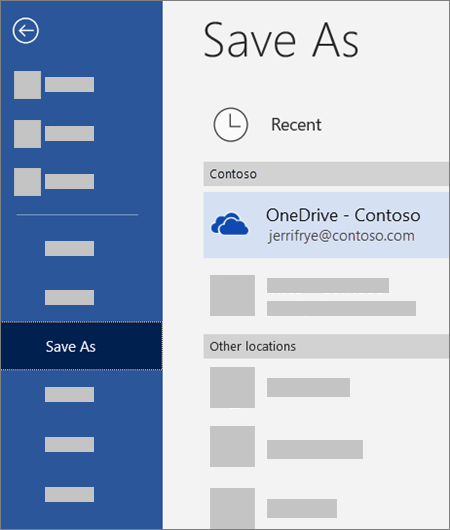
In any Office document, select File > Save As, choose your OneDrive, and then pick the folder where you want to save the file.
If you don't see OneDrive in the list:
Select Add a Place
Select OneDrive and sign in with your UCF NID@ucf.edu account and your NID password.
Troubleshoot OneDrive Mover issues
Ensure OneDrive for Business (your @Knights account) is selected as the source and,
OneDrive Consumer (your personal OneDrive and not your @ucf account) is the selected destination.
- If you run into any issues, get the logs and go to this page to submit a support request.
For example, if files fail to transfer, select the number under Files Failed and then select User Actions > Download Logs, so you can include the logs in your support request. Note that logs are available in Mover for 90 days.
Data migrated by Mover
Mover only migrates data from:
An individual's online drive storage, such as OneDrive, MyDrive, etc.
Mover does not migrate e-mails, mailboxes, contacts, calendars, site layouts/collections/pages/lists, etc.
Unsupported files and characters
We automatically process file and folder names to ensure they're accepted by Microsoft 365:
Files larger than 15 GB aren't migrated.
Files with a size of 0 bytes (zero-byte files) aren't migrated.
The following characters in file or folder names are removed: " * : < > ? / \ |