Recording owners (either the person who started the recording, or any additional owners named by that person) are the only people who can delete recordings.
Delete files or folders in OneDrive
You can delete specific files or photos on Microsoft OneDrive, or you can delete entire folders and all the items in them. If you need to, you might be able to restore deleted files from the OneDrive recycle bin.
Note: If you want to remove files from your local computer while still keeping them on OneDrive, or vice versa, see Delete items from your OneDrive, your hard drive, or both.
-
Go to the OneDrive website. You might need to sign in with your Microsoft account, or your work or school account.
-
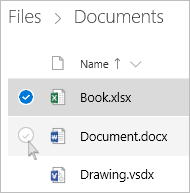
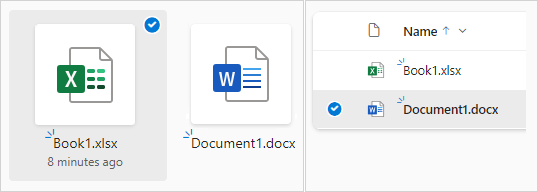
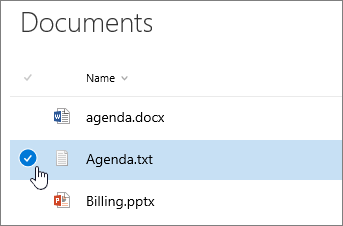
Select the files or folders you want to delete by pointing to each item and clicking the circle check box that appears. (The left image below shows items in List view, the right image shows items in Tiles or Photos view.)
-
To select all files in a folder, click the circle to the left of the header row, or press CTRL + A on your keyboard. (You can also select several files at once by selecting one file, scrolling down the list, then hold down the Shift key while left-clicking the last item you want to select.)

-
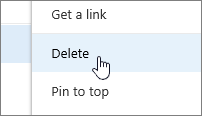
On the bar at the top of the page, select Delete. (You can also right-click the selected file or folder and select Delete.)
Note: If you do not see the Delete icon in the top navigation bar, or when you right-click a selected item, you may not have permission to delete that file or folder.
-
To delete a folder, rather than just its contents, you may need to go up or back a level to select the whole folder.

Notes:
-
A personal OneDrive folder does not need to be empty before you delete it. However, you may want to check beforehand that there are no files or sub-folders within it that you want to keep.
-
With OneDrive for work or school accounts, a folder must be empty before you can delete it, if your admin has enabled retention in OneDrive for work or school accounts.
-
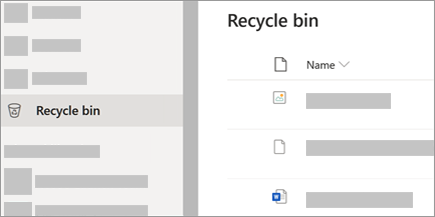
Empty your recycle bin
Your deleted files and folders go to the OneDrive recycle bin from which you can restore files if you need to.
First, select Recycle bin in the OneDrive left side navigation.
-
To permanently delete specific files or folders from the recycle bin, select those items, then select Delete in the top navigation.
-
To permanently delete the entire recycle bin at once, select Empty recycle bin in the top navigation.
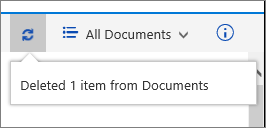
Note: Once you delete files from the OneDrive recycle bin, there may be a short delay in seeing that reflected in your OneDrive account's storage availability.
Delete from your OneDrive but not your hard drive
If you want to keep a file, photo, or folder on your computer, but not on OneDrive, use File Explorer (or Mac Finder, if you're on a Mac) to move the file outside your OneDrive folder to a different folder on your hard drive.

Delete from your hard drive but not your OneDrive
If you want to keep a file, photo, or folder on your OneDrive, but not on your computer (because you don’t want it to take up space), put the file in your OneDrive folder, then turn on Files On-Demand (Windows) (or Files On-Demand (Mac)). You’ll still see the file in the OneDrive folder on your computer, but it will take up zero hard drive space.
Delete from both your OneDrive and your hard drive
If you have synced your OneDrive to your desktop/hard drive, use File Explorer (or Mac Finder, if you're on a Mac) to find and delete the file, photo, or folder.
Delete a file, folder, or link in SharePoint
Important: When you delete a folder, it deletes the folder and any files or subfolders it contains. Consider moving or archiving the contents of the folder before deleting it. You or your administrator might be able to recover a folder and its contents from the Recycle Bin.
-
In SharePoint, open the document library and hover over the item you want to delete, and select the checkmark.
Note: Does your screen look different than this and you're using SharePoint in Microsoft 365 or SharePoint Server 2019? Your administrator may have SharePoint Classic experience set on the document library. If so, see Deleting items in a SharePoint Classic experience library.
To delete multiple items, repeat this step. You can delete as many items as you want.
-
Select Delete
 .
. -
In the Delete dialog box, to remove the item, select Delete.
The status box appears in the upper top of the document library informing you that the item has been deleted.
Restore items in the Recycle Bin of a SharePoint site
Upload files and folders to a document library
Delete a file, folder, or link in SharePoint classic experience
Important: When you delete a folder, it deletes the folder and any files or subfolders it contains. Consider moving or archiving the contents of the folder before deleting it. You or your administrator might be able to recover a folder and its contents from the Recycle Bin.
-
Open the SharePoint document library where you want to delete items.
-
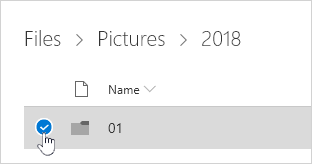
To select one or more items that you want to delete, hover over the folder, and then select the checkbox.
-
Right-click a file, folder, or link icon, and then select Delete.
-
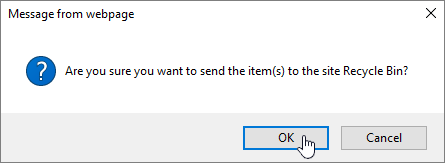
In the Delete confirmation dialog, click OK.