The purpose of this document is to demonstrate how to upload and create documents inside of Microsoft Teams
Microsoft Teams makes it easy to create, share, and collaborate on documents. By default, files uploaded to a team are usually available to everyone on the team. If you want to share a file or folder with one or more people without adding them to the team, you have a few options.
To learn more, visit Microsoft's Tips for Teams files.
Upload or create a file
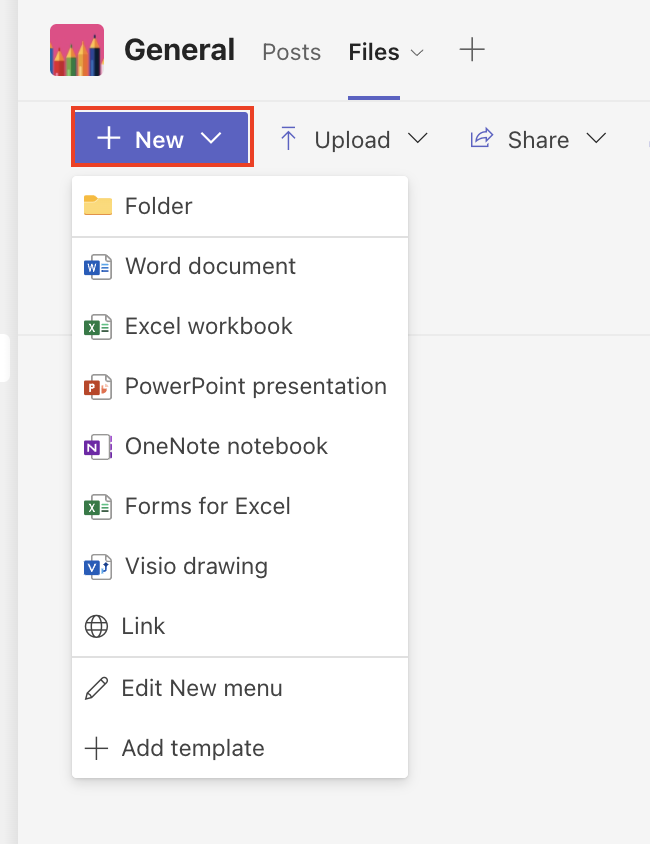
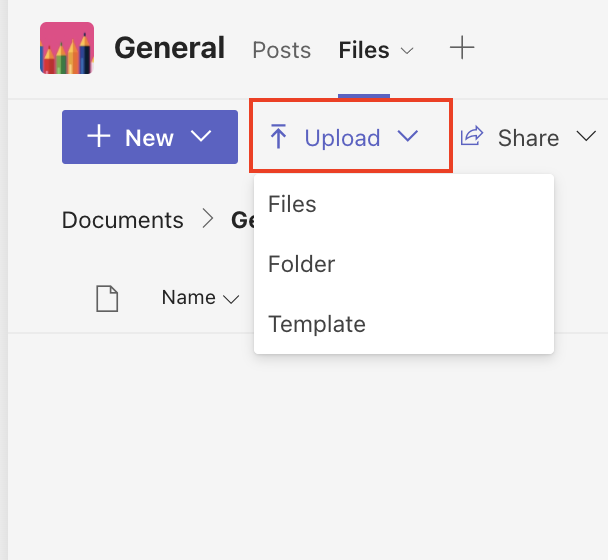
From your Team, click the Files tab and select +New or Upload
- If you select +New, you will see a dropdown of options for files you can create.
- If you select Upload, you will be brought to a selection window to choose files to upload.
Find a file
Files you upload to a channel are stored in your team’s SharePoint folder. These files are available in the Files tab at the top of each channel.
Types of link settings
Whether you generate a link through the copy link or share option, you’ll get the same choices of links you can generate. Review the options to select the best one for your sharing needs.
| Who would you like this link to work for? | More about this link | Important to know |
|---|---|---|
| Anyone | This option is the least secure. | This link setting is grayed out and unavailable at UCF |
| People in UCF | This link gives anyone at UCF who has the link access to the file, whether they receive it directly from you or forwarded it from someone else. |
|
| People with existing access | This is a more secure link. It doesn't change any permissions and doesn't share the link. |
Use this to send a link to someone who already has access. |
| Specific people | This link will only work for the people you choose. |
If you select this setting:
|
Other settings
- Select one of the following options to determine the permission level:
- Can edit,
- Can review,
- Can review.
- Optional: Use the toggle to block the recipient from downloading the file.
Share by Copy link
From within your Team, click the Files tab.
- You can copy a direct link to your file in Microsoft Teams to share with someone. Select the file, click More options (three-dots icon) and select Copy link.

- Select Copy. Paste the link and send it in an email, message, or post.
Note: Before sharing, you may need to edit permissions for the link. To do this, click "people you specify can view" to open sharing settings and determine who you want to share the link with. When you are done, select Apply. For more information, refer to the section above on Types of Link Settings.
Share by Copy link
- Pick the file or folder you want to share by selecting its circle icon. Select Share at the top of the page and select Copy link.
- Click People you specify can view to open sharing settings and select an option for who you want to give access to with the link. When you are done, select Apply. Select Copy and paste the link and send it in an email, message, or post.
Share by Send link
From within your Team, click the Files tab.
- Select the file or folder you wish to share, and then click the Share arrow to bring up the Send link pane.
- In the Name, group, or email field, enter the email address or contact names of the people you want to share with. You can also choose a name from the people pick list that appears.
- Add a message if you'd like, and select Send.
